I am a successful mastering engineer… so why did I just hire a mastering engineer?

As many of you know, in addition to my production and mixing work, I have a fairly successful career as a mastering engineer. It has actually been the majority of my work in this last crazy year we are living through. I recently did something people might not expect… I hired a mastering engineer.

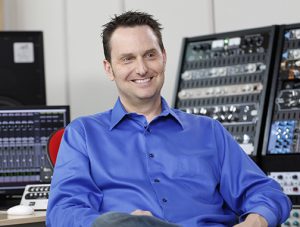
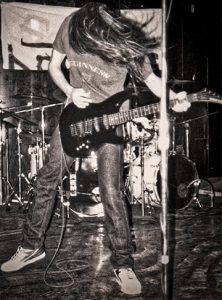
I was skinny once!

I got my start in music playing in the early punk and alternative scenes. My bands shared the stage with the likes of the Flaming Lips, Henry Rollins, Iron Cross, Death Angel, All, Dinosaur Jr, etc. When I fell in love with recording at the end of the 80s, I had an idea that I would be a record producer and an artist, but producing and engineering became all consuming.

Throughout the years I have played sporadic gigs (usually my experimental ambient work in Europe), and I have continued to work on my own music in my limited downtime, when I was not making records for other people.  Over the last several years, I have committed to developing a lot of the various musical ideas into a finished album of my own work. I was creating my own  massive and insanely diverse album, that was too daunting to tackle, even for a guy that tackles daunting albums as his day job. So I have now decided to break my massive album up into a couple albums and a few singles. This has the benefit of being smaller projects I can actually get done, but it also has the benefit of creating more artistically focused albums. There is a dark ambient album on the way, with a more rock centric album to follow. Next week I am releasing my first two singles, which are really intense, aggressive and experimental instrumental tracks that I made with some of my friends from King Crimson and a couple Zappa alumni (it is definitely not everyone’s cup of tea!).

So, back to me hiring a mastering engineer…

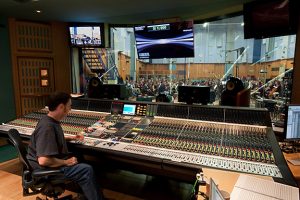
John Rodd at Clearstory Sound

I had some buddies help me with some of the tracking while I played guitar, but I have been doing all of the mixing and mastering myself. I mix and master for other artists all the time, but something happened to me. Despite the fact that I have worked on several hundred albums for other artists, trying to finalize my own music is something completely different. I was wrestling with a lot of the same second guessing and insecurity that so many other artists feel. I had settled on mixes for the singles that I was happy with…. and I mastered the tracks, and I thought they sounded pretty good, but I was not 100% sure. I was second guessing myself and I had been so deep into the minutia of every aspect of the tunes from beginning to end that I was losing focus… So I reached out to mastering engineer John Rodd at Clearstory Sound to see if he was available to have a go at doing some mastering for me.

John is most known for recording and mixing film and video game scores (some of my coolest game credits are actually gigs I got because John was double booked and he recommended me), but John also does lots of mastering of rock, EDM and other genres of music for artists all around the world. John and I have a similar amounts of experience, a similar level of gear, and a similar level of credits (in different areas) but John has something I do not have….. an outside perspective on this project that I am so buried and emotionally involved in!!!

I consider John and I to have equal skills, but his masters were better than mine!

It is instrumental guitar music and I am the guitar player. I think what happened is that I had been overly focused on the guitar, and that I was neglecting the whole. John made some EQ changes that altered the guitar tone that took me by surprise when I got the masters back, but when I stepped back I was able to see that John worked as a great mastering engineer that was looking at the big picture, rather than the egocentric artist focused on his personal guitar tone.

So is John a better mastering engineer than me? I think we are about equal, but I would not begrudge anyone coming to that conclusion. The most important thing John brought to the table in addition to his decades of experience was his outside point of view.

John Rodd at Abbey Road

To put this into perspective, one of my coolest mastering credits is the film score album for Jordan Peele’s amazing film “Get Out.” John had been hired by the score’s composer Michael Abels to mix the score for the film (as John does for lots of big movies), and John was obviously more than qualified to also master the film score album, but John wanted some “fresh ears” (some outside perspective) on the mastering of the score album on this particular project, so he recommended me.

Is the point of this long tome to tell you to hire John or me for mastering? Absolutely not. My reason for sharing all of this with you is to get you thinking about the value of outside perspective when you are feeling rudderless, confused or stuck in a rut with your work.

If you are a hobbyist without the budget to hire guys like us, consider reaching out to friends or other people in recording forums (like Ronan’s Recording Boot Camp Hang on Facebook) that are at your level. This does not just apply to mastering or mixing. If you are feeling stuck or need new perspective or inspiration, never overlook the value of getting other people involved. Bring in others to come up with new guitar parts, or help program drums, or collaborate on lyrics…. There is something cool about doing everything yourself, and sometimes that is the perfect way to work, but it is amazing how often bringing in outside collaborators on things can take things to a level that never would have been possible by one person or one point of view. I am blessed to often work with some of the best musicians in the world, but it is amazing how many times albums I have produced have magic moments created by lesser-known or amateur musicians that might be friends of the artist, or that we happened to meet during the production process.

The world of music making has changed over the last couple decades and more projects are made with less and less people involved. I am not going to say that is wrong, or try to hold back the tide, but so many of the greatest records of all time were made by the collaboration of various perspectives. It is worth keeping that in mind when you are working on your own projects.

 

Unless you have been living under a rock, you know that Billie Eilish and her brother/producer Finneas completely dominated the GRAMMYs® this year. Personally, I am really happy to see extremely creative new music having both industry recognition and fantastic commercial success. I think it is also inspiring that, even though it was mixed and mastered by experienced pros, the recording and production was done by rather inexperienced people in a bedroom with modest equipment.

You have no excuses!!!

If you listen to the album, there is one thing you cannot help but notice… The low end on some of the songs is INSANE!! I do not say that as a bad thing, but good golly, that low end is huge on some of the stuff!

If anyone has seen me lecture about recording or mixing, you have heard me talk about what a beast low end is, and how much we have to focus on keeping it in check, so how can we have such a cool sounding and successful album with insane amounts of low end? The answer is, giving the low end its own real estate.

Sounds with big low end do not play well with others!!

The thing about sounds with big low end is… they do not play well with others!! In situations where low end has to share space with other low end elements, things usually do not work well. In our minds it might seem cool to have multiple sounds with massive low end in a mix, but the reality is that most times they just turn into mud, and the end result is that mixes actually end up sounding smaller rather than bigger.

The Billie Eilish songs work because when they have big low end, the arrangements are sparse and there is only one element in the mix that gets to have low frequency energy. If you take a listen to the massive hit “Bad Guy”, you will notice that most of the song has:

Synth bass (big low end)
Kick drum (midrange-y and short)
Snaps (no low end)
Shaker (no low end)
Vocals or melody synth (midrange but no low end)

That is it for most of the song!! Super sparse and arranged really well. The low end synth has plenty of room to move around and no other element in the mix is encroaching on the synth’s low end real estate. This is done expertly on the Billie Eilish album, but it is not unique. You see this same technique used on lots of Reggae, Drum n Bass, Trap, Hip Hop and several other styles of electronic music.

The secret to big low end is to keep the arrangement sparse and only let one element in the mix be huge.

… now get back in your bedroom and knock out some hits!


3 Women’s Scholarships announced for the 4th annual Mountain Recording Retreat.

Repost of Boston AES Press Release

Audio Builders Workshop Announces the Selkie Scholarship for Mountain Recording Retreat

The Audio Builders Workshop has announced the formation of the Selkie Scholarship. The Scholarship (a $1,347 value) to attend the Mountain Recording Retreat, hosted by Recording Boot Camp, is being offered to 3 qualified women age 18 or over (transgender or cisgender; non-binary individuals are welcome).

The 2019 Mountain Recording Retreat, held May 19-24, is about community, music, and great sound. It’s an opportunity to spend a week learning, listening, and relaxing in a community made up of world-class mentors and fellow music makers. The 5-day retreat includes a room with private bath in Capon Springs, an all-inclusive resort in rural West Virginia. The resort features a golf course, spa, beautiful hiking, and best of all, no WiFi in the rooms. Being unplugged allows participants to spend a few days focused on recording and community. Attendees are provided with three meals a day in the communal dining hall, where everyone eats together. (RecordingRetreat.com)

The Selkie Scholarship will be offered annually to applicants with strong potential and demonstrated aptitude. Applicants will provide an example mix along with an essay explaining what they hope to take away from this clinic and how this opportunity could help them in their own unique situation. The application period runs from October 10, 2018  – February 15, 2019 and the form can be found at goo.gl/forms/5ipnGhqd1Rbhae2N2.

The Audio Builders Workshop, through efforts like Selkie Scholarship, is dedicated to encouraging the entry of talented women into the profession of audio engineering. Audio Builders Workshop is a work group of the Boston Audio Engineering Society.


Apply Now

goo.gl/forms/5ipnGhqd1Rbhae2N2.


The video lessons you really need! (hint: they are not from me)

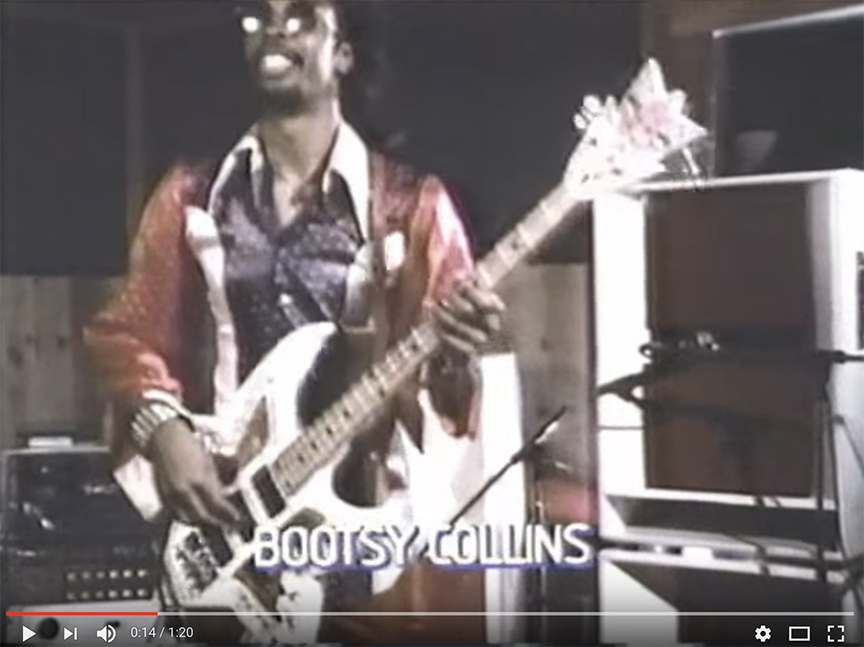
I came across a video recently that I had seen a several years ago and I was reminded of how profoundly it helped me as producer. It was not an EQ trick, it was not a snare sound tutorial, it was a video by the amazing Bootsy Collins, the king of funk bass.

In the video Bootsy does a really simple straight forward explanation of funk bass and where to put the rhythmic emphasis on classic funk grooves. But the way he explained it got me rethinking how I put parts together for not only funk, but rock, pop, EDM etc. It influenced a lot of my production decisions. I had a similar experience watching a drum tutorial by the great German drummer Benny Greb. He explained concepts about playing ahead of the beat or behind the beat that solidified my understand of what I knew internally but could not articulate. It helped me build grooves and communicate with other musicians I was collaborting about feel in ways I could not do before. It made me a better producer.

So as much as I have learned by watching producers and engineers talk about EQ and compression, etc, the things that have had the most significant impact on me have been hearing great musicians talk about MUSIC. Great production is much more about bringing out the best in the performances and the song than what kind of snare sound you can get.

Check out the Bootsy video.

When to bring automation into your mixing workflow

Automation is great in a mix! The ability to sculpt a mix dynamically by bringing emphasis (or de-emphasis) to various elements throughout the song is really powerful. We can even use automation to manipulate the rhythmic feel of sections of a mix. But, in my experience, the point at which we incorporate automation into the mix process can have a big impact on mix workflow.

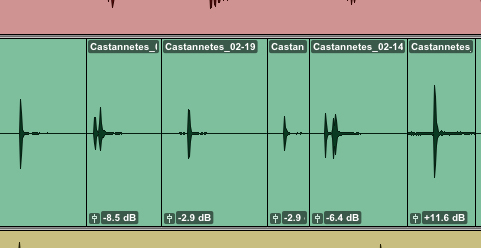
I like to work with “clip gain” automation at the very beginning of a mix, where I am adjusting the levels of various regions within the audio file. The great thing about this is that the level changes are happening before any of my plugins (or hardware inserts). This allows me to hit dynamic processors like compression with more consistent levels. I am usually not going crazy with this, but if certain drum hits or vocal passages are way out of whack (much higher or lower) than the rest of the track, I will use clip gain to get it into a closer range with the rest of the performance.


After clip gain automation I will generally leave fader automation until the end of the mixing process and I recommend you strongly consider doing the same. The fader automation is the automation that happens after all of our plugins and hardware inserts. There are two big reason why I leave this until the end of the mixing process:

1) One big reason is that starting automation early is just a pain in the butt. If you start doing automation early in the mix, every time you want to make fader adjustments later in the mix you are fighting against the earlier automation moves. Sure, I know there are various strategies to deal with this in your DAW, but they generally add one more layer between the process of you feeling a change needed in the mix and making it happen. For most of my mixing process, I want the experience to feel like improvising a piece of music, where I can have an idea in my head and make it happen quickly. This is one of the reasons mixing on large format consoles can be such a joy; it can feel like playing an instrument! Once I have done most or my intuitive mixing work, in the last 10-15% of the mix process I will get into the final tweaks and start automating my fader moves.

2) The second, and probably the more important reason, is that people will often start using automation to solve problems, when there is actually a better remedy. Like most successful mixers, I use a lot of compression on the individual tracks of my mixes, so by the time the audio hits the fader, so to speak, it is fairly even in terms of “loud parts” and “quiet parts.” Often we can find ourselves in situations where something like a vocal is not present enough in a certain part of the song, so we reach for automation to push the vocal level up in the mix. While that is not empirically wrong, it may not be the best solution. Before pushing up the vocal level in a section with automation it is important to look to see why the vocal lost its presence in that section. Many times it is because another element has been introduced that is fighting the vocal. Before pushing up the vocal level I am looking to see if some new element has a lot of energy in a certain frequency range that competes with the vocal. I am going to see if there are things I can do with subtractive EQ or panning on that new element to solve the conflict, rather than just push up the vocal to overpower the conflict. 

In my approach to mixing, I am working to make my song sound great from beginning to end without any automation at all, and then I am using automation for creative reasons at the end of the process. If your mix does not sound great without automation, you most likely have problems that are not related to automation that need to be fixed first.


_

By the way, if you want to hang out in North Italy for a week and study recording with me in a villa drinking wine and eating home made Italian food, I have a spot left for my 6-day recording boot camp September 24-29, 2018. Get more info HERE.

Mix Like a Wedding Photographer

I am on my last day of mixing a 10 song album for a Canadian folk-rock artist. Last night I was working on one of the tunes that is more natural and acoustic based. I had the vocal panned straight up the middle and the main acoustic guitar panned off to the right side. About 2/3 of the way through the song, there are 16 bars where the singer does not sing and the guitar plays a little busier and a little more melodic. The guitar seemed like a cool feature. So I created a new track in Pro Tools and moved that melodic guitar section to the new track. I panned that straight up the middle and compressed and EQed it so it would stand out as a feature. In a sense, it replaced the lead vocal in the section.

It dawned on me how unnatural it really was, that for 16 bars the guitar would be in a different place with a totally different sound, but then it struck me how little I cared about that.

If I am working on classical chamber music or audiophile jazz type recordings I will work to keep the image as natural as possible, but for almost any other kind of project, what I care about most is conveying the emotional experience of the song. It is kind of like photography work (FYI: one of my hobbies is photography which I do semi-professionally). Someone had asked me to shoot their wedding a while back. It was pretty easy, the setting was lovely and the bride looked beautiful, but after the big day I still spent a long time doing post-production on all the photos. The truth is that I did not really care about my photos being technically correct. I cared that the photos conveyed the emotion of the beautiful experience the couple and their guests had. I cared that the couple looked gorgeous in every shot. I cared that my framing and lighting brought the viewer’s attention to what I thought was the most important element of the photo. So I adjusted lighting, fixed blemishes, enhanced the richness of the color or the sky….

It is important to remember that, except for a few people in the world (generally audiophiles with $10,000 speaker cables!), most people are not listening to our work to hear something that is technically accurate, but to have an emotional experience. I feel that the best mixes are those that serve the latter.

By the way, I have two 6-day Recording Boot Camps coming up in Southern California and North Italy. Check out the latests schedule.

Why record real drums if you are using samples in the mix?

A student taking my online Drum Recording Boot Camp course asked me an interesting question this week after studying the section on using samples to supplement acoustic drums in a mix. He asked:

“If you are going to use samples in the mix, why not just use drum trigger pads instead of recording acoustic drums?”

This was a good and interesting question and this is my answer:

1) When I am tracking drums I am trying to do it in a way where using samples in the mix is not necessary. I may end up using them for creative reasons (or, to be honest, if I do not get the recorded sound as good as I had hoped). The hope is that drum samples will not be needed unless it is for a particular creative effect (like modern metal where “fake” is the sound they are often going for).

2) Playing a trigger pad feels different. If a drummer is not used to playing with one, I do not want him or her playing on something that might feel “weird” and mess with their performance.

3) The biggest reason is that in a mix we are often “supplementing” rather than “replacing” drums. If we are using samples to enhance consistency of drum levels or to fill in frequency ranges that might be lacking in the recorded drums, we still get to preserve some of the natural variations in level and tone that give a performance a more human feel, and we also get some of the mix advantages of using samples while preserving part of the unique personality of that drummer.

If you are interested in learning more you can check out Drum Recording Boot Camp, my 12-hour drum recording and mixing course. We still have space in the 6-day Recording Boot Camp starting in a couple of weeks.

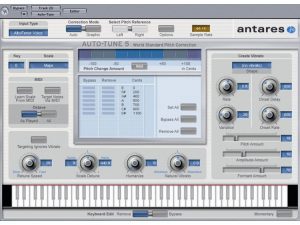
Fixing a Vocal Using Auto-Tune, without using autotune to fix the vocal

This article is in my e-book, “Audio Recording Boot Camp”. Get it free here

(Auto-tune is a registered trademark of Antares, but I am using the term here generically to describe all pitch correction software)

Since the beginning of recorded music we have had to deal with the fact that some vocalists do not sing quite as in tune as they or the public might want. Since then producers have been trying to find ways to improve the performance of singers on recordings. In the earliest days the solution was to try and have the singer perform better, or pick easier material, or just let the performance stand as is and let the public decide.

By the late ’80s and early ’90s, when I was first getting serious about recording, digital technology had opened up a few options for actually fixing a vocal performance. A few of the common techniques were to record a flat or sharp word into a sampling keyboard, change the pitch in the sampler, and then “play” the pitch corrected word back into the vocal track. The other common technique was to use a hardware pitch shifter, such as the legendary Eventide H3000, to digitally shift a word more sharp or flat to get it in pitch. While these techniques provided options for fixing recorded vocal tracks, they had two main drawbacks: the first is that they were extremely time consuming. It was necessary to evaluate the pitch word by word, and then make adjustments one word (or even one syllable) at a time. Getting it to sound right often required quite a bit of experimentation. The second problem is that you could only lower or raise the pitch of the entire note or syllable. If a vocal gradually changed pitch, such as starting flat and eventually getting into correct intonation by the end of the word, there were only a few options to alter this, which required very, very detailed audio magic. This all changed in 1997 with the introduction of Auto-Tune by Antares Audio Technologies.  Auto-Tune was able to analyze and correct pitch problems in near real time. It also allowed pitch to be gradually adjusted within a single note. This changed everything! (Fun geek fact: the inventor of Auto-Tune, Dr. Harold (Andy) Hildebrand, developed the process based on his research using similar theories to analyze seismic activity: Earthquakes!!) Although Auto-Tune is a trademark of Antares, the term is often used generically to describe all automated pitch correction, such as that done with Melodyne by Celemony (the most popular alternative to AutoTune), or Waves Tune by Waves.

In the early days, “Auto-Tuning” was a stealth activity carried out by producers and engineers in secret late night sessions—something that needed to get done—but producers prayed the artists would never know it happened. Artists would often get furious at the idea that someone had messed with their vocal in a computer. And it would have been somewhat scandalous if the fans found out about it. Since those days, things have completely changed and producers are often met with just the opposite reactions. Nowadays, when asking a vocalist to perform a part again to improve their intonation, the artist often asks the producer to just fix it in the computer (or “just Pro Tool it” as they say). In fact, it has now reached a point where the artifact of poorly applied pitch correction (known as the Cher effect) is considered a cool effect, and extensively used by artists such as T-Pain and Kanye West.

Despite the ubiquity of pitch correction in modern recordings (and even live concerts), there are still many instances where it is not appropriate to “fix” the vocals. This is usually where the producers and the artists want to preserve the integrity of the recording for personal pride, or to be able to honestly tell their fans and the press that their vocals were not fixed. However, as the excessive Auto-Tuning craze seems to be reaching its apex, a reverse trend is growing. Artists and their fans are now starting to desire authentic performances. But the reality is that even after vocal training, some artists still need a helping hand to deliver vocal performances with good intonation. And pitch correction software can help without actually being printed on the final mix!

Everybody sings better in the choir!

There is an old but true adage that everybody sings better in the choir. When singing in a group, especially one with good singers, it is much easier, even for a poor singer, to sing with better intonation. This is something we can use to our advantage when working with a singer that needs a little extra help with intonation, but does not want to have their vocals “fixed”. (It is also worth noting that “fixing” vocals can sometimes remove some of unique character of a vocalist.)

One of the tricks we would do in the old days was to feed a keyboard into the singers headphones as part of the mix and play the melody on the keyboard while they sang. This was effective but there is a new technique that is actually easier for both the producer and the singer. The technique is very simple but very effective. If I am working with a vocalist who is having trouble with pitch/intonation, I will often record a few vocals tracks with them and send them away while I use pitch correction software to make every note of the vocal track in tune. After that, I will get the singer back in the studio, but now I have them sing the new vocal take while listening to one, or several, pitch-corrected vocal tracks in their headphones. This gives them a very similar benefit to singing in a choir by allowing them to adjust their intonation to the voices around them. This is something that most vocalists do naturally without even thinking about it. Now the vocalist is free to concentrate on the emotional energy of the performance and less on the intonation.

If they are still having trouble, I will often double the most difficult notes with another instrument such as guitar or piano (or another voice). One of the great things about this technique, aside from the fact that it can be very effective, is that artists who are staunchly anti-Auto-Tune are usually completely fine with this technique—even when they know exactly what you have done. It’s just a modern variation of the old trick of playing the vocal melody on a piano or synth along with the singer to help them with their pitch. In the end you can wind up with a vocal track that the singer and all involved can feel proud of—and rightly claim as 100% authentic!

Somewhat unrelated, but if you have made it this far I will throw in one more bit of advice: if you are going to be using pitch correction software on the final vocal, do not “Auto-Tune” on autopilot and fix every note. Much of the energy and emotion of a song comes from vocalists singing slightly above or below the pitch at various times. The vocalists on some of the biggest selling albums of all time would have never made it past the “fixing” of some current overzealous producers.

Check out our upcoming courses HERE 


Brainworx bx_digital V3

Ronan’s Top 10 Plugin Alliance Plugins

I have bought a lot of plugins from Plugin Alliance, and since becoming friends with the guys that run the company, I have helped them out with some volunteer beta testing and I have used some of their plugins in my videos (some of which they put on their website). This has given me the opportunity to get some NFRs for a bunch of the other plugins they sell (NFR means I get it for free, but can never sell or transfer the license).

Plugin Alliance just announced an interesting new PickPack “rent to own”  marketing idea. “Rent” any 10 of their plugins for $29 for 29 months. After 29 months you own the plugins. That got me thinking about what my top 10 plugins are from Plugin Alliance would be. So I thought about it and put this list together. I have never received a penny for recommending products from any company, so it makes no difference to me if you get in on that offer or not. I am just putting this together to share some info about what I use and why.

This list is not meant to tell you what would be the best deal, or even to tell you which of these plugins are the best, but only which ones I use day in and day out working on albums, video games, etc.

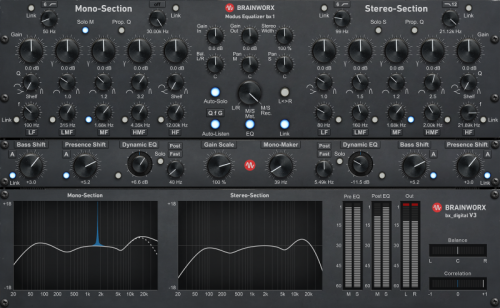
Brainworx bx_digital V3
https://www.plugin-alliance.com/en/products/bx_digital_v3.html

It took me a while to wrap my head around the intimidating interface, but once I did, I got hooked. I use this as the first step in my digital mastering chain as a problem solving tool. It has very flexible clean EQ and tools to fix problems with stereo imaging. I almost always use it in mid-side mode so I can sort out problems in the middle or the sides without having too much impact on the areas that do not need the fix. Honestly, I cannot think of the last time I have boosted with this EQ (except when using the bass or presence shift). It is probably good at that, but I have other hardware and software tools I like to use for boosting.

Brainworx bx_dynEQ V2
https://www.plugin-alliance.com/en/products/bx_dyneq_v2.html

This is a fantastic tool for fixing intermittent frequency problems. If you are not familiar with dynamic EQs, they are basically EQs that only work when the amount of energy in one frequency range exceeds a threshold. There are a lot of things you can do with them, but mostly I am using them on masters when there are certain parts of a song where one frequency gets really unpleasant. One great example of this is when you have a singer that gets harsh or nasally only in a certain register. Sometimes if you EQ out the harshness overall on a master, the vocals can sound dull on the non-harsh parts. This is also a great tool on drum overheads when there is one particular cymbal that gets overly harsh or piercing. This is another tool I almost always use in m-s mode. In mid-side I can be more aggressive on a center panned vocal without major impact on the guitars, etc. panned out to the sides.

Elysia nvelope
https://www.plugin-alliance.com/en/products/elysia_nvelope.html

I LOVE transient shapers! The first time I used an SPL transient designer, I knew my mixing life would never be the same. The SPL Transient Designs plugin is great. In fact, it was the first plugin that I ever shot out against the hardware where I preferred the plugin. Most of the time I am using Transient shapers to reduce sustain on drums because “shorter” drums have so much more impact. But over the last few years I have been using the Elysia nvelope more because of its ability to adjust high and low frequencies independently. Being able to reduce the sustain of just the low end on a kick drum or floor top is a game changer. Here is a video I made about that.

SPL Passeq
https://www.plugin-alliance.com/en/products/spl_passeq.html

Truth be told, I still do a huge amount of my EQ boosting in mixing and mastering sessions with hardware, but when I am boosting in the box, this is probably the one I use most. It sounds big and full and I can get away with a bigger range of processing than I would normally expect from a plugin. But, also, every once in a while I prefer this over the hardware. The Passeq is a “passive” style EQ (pultec-ish), and I love passive EQs for tone shaping. I have a few passive EQs in the hardware rack that I am crazy about, but sometimes their tone can color a little too much. The Passeq lets me do some of that passive style tone shaping with a little less coloration in the low end, which on certain masters can work better. Also, I love that I can use the EQ in m-s mode letting me tweak the center and sides independently. Here is a video I made about using the Passeq in a mastering session in that way.

ACME Opticom XLA-3 & Brainworx bx_opto
https://www.plugin-alliance.com/en/products/acme_opticom_xla-3.html
https://www.plugin-alliance.com/en/products/bx_opto.html

I love opto (or LA-2-ish) compressors. They sound so great on such a wide range of sources and are so insanely easy to use. I have a couple of hardware opto compressors in my racks that I use all the time, but I also use opto comps a lot in the the box and that usually happens with one of these two plugins. Without getting too deep into either one, I use the bx_opto when I want something on the cleaner side, and the opticom when I want more saturation and coloration. I dig them both, but day to day I find myself using the bx_opto more.

Elysia alpha compressor
https://www.pluginalliance.com/en/products/elysia_alpha_compressor.html

I use a ton of compression in my mixes and often push compressors pretty hard, but when I want very detailed control with compression, that I want to be transparent, this has become my go-to ITB compressor. I really like this one for acoustic guitars when I need more control than I can get from an opto compressor. It is great for getting kicks and snares to feel more consistent without altering the tone and in mastering when the coloration of my outboard compressors is not quite right. 

Maag EQ4
https://www.plugin-alliance.com/en/products/maag_eq4.html

Maag was started by the guys that started NTI/Nightpro years ago. The unique thing they did was an EQ with really wide bands and a high shelf “air” band with a really interesting curve. It was pretty mind blowing. I bought my NTI EQ in the mid 90’s. The cool trick with this air band is doing shelf boost at 20 or even 40k! This EQ can open up the top of vocals, drums, strings, etc., that is unlike anything else I have ever used. The Maag plugins bring that into the digital domain. I still have 4 hardware channels in my rack, which if find to be slightly better than the plugin, but not by much. I use the plugin EQ all the time. Everyone always talks about the high end boost of the EQ4 (and rightfully so), but it is worth noting that the low end is really unique. Many times I find that a slight cut on the “sub” band and a slight boost at 40Hz can do fantastic things to the low end of a mix.   Here is a video about making vocals bright without harshness that features the EQ4

Brainworx bx_refinement
https://www.plugin-alliance.com/en/products/bx_refinement.html

You just have to demo this one to understand it. It is one of my favorite tools for fixing harsh elements in a mix (and a master in some extreme cases). Drum overheads or vocals or distorted guitars that have super harsh high-end (usually caused by using cheapo condenser mics) is one of the toughest things to deal with in a mix. When you use EQ to tame the problem the end result can often be a sound that has lost presence or clarity needed, or the mix really needs that high end to work. So you undo the EQ and you are back to the troublesome harshness. I have no idea how it does what it does, but bx_refinement somehow manages to soften the harshness of the sound without killing the high end energy. Some tape emulation plugins can be good for this as well, but they usually color the mids and lows a lot. bx_refinment does a good job of just focusing on the trouble in the high-end without changing the mids and lows too much. 

Noveltech Character
https://www.plugin-alliance.com/en/products/noveltech_character.html

Gwar The Blood of GodsThis is another plugin that I honestly do not know what it is doing. It seems like a combination of EQ, dynamics and saturation that focuses presence and intensity in various ranges. This is not used on every mix I do, but is a godsend when I really want it. Sometimes simple EQ boosts do not get me quite what I am looking for (usually when looking to get things more “in your face”). It gets the most use trying to get keyboards and electric guitars to feel more aggressive in a pleasing way (is that an oxymoron?). I used this quite a bit on the new album “The Blood of Gods” by Gwar.

So What about the Brainworx Console Channel Strips?

They are probably really cool, but, honestly, I do not own any of the new ones and I have not really spent serious time playing with the older one. If I was to grab one without serious testing it would probably be the bx_console G because I love mixing on G series SSL so much. But I have never used it so I cannot vouch for it.

A couple that almost made the list:

The new bx_rooMS reverb is pretty impressive so far and I could see myself using it quite a bit, but I have not had enough time to experiment with it to find out if it is going to be a regular part of my workflow. The Lindel TE-100 is a very cool EQ that has worked really well on a few projects, but has not become part of my regular workflow. Also, when I master, I am using several meters, and the bx_meter is one of those, but not the one I lean on the most.

Do you want some in person training?

We are presenting multiple Recording Boot Camps and Retreats this year in the US and Italy and several of them are close to selling out. Get more information about them HERE.